Ok, its time to get the roof rack and ladder sorted, I had previously part built the roof rack but was unable to move it on my own. Eventually, i fitted an electric winch to the roof of the workshop, this made it easier to offer up to the truck.
I just lifted the rack to the roof, drove the truck under it and dropped it back on the cab roof.
Once all the lighting brackets are welded on, it's off for galvanizing and then satin black paint.
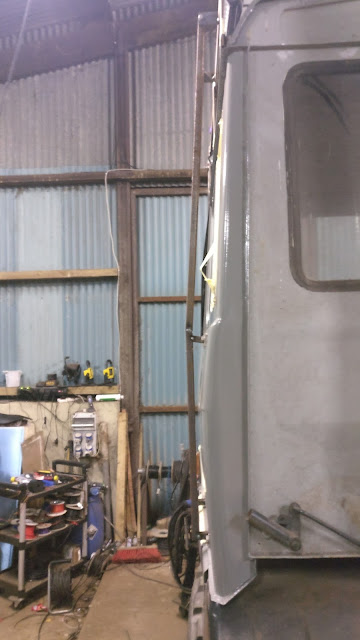
The ladder was a bit tricky, it had to be shaped to the side contour of the cab.
You can just see the test fitting of the roof lights and light bars if you look carefully !!
The lights on the side are for security and will light with the ones on the body, the led bars up high are for off-road lights as is the big bar on the front. The ones on the corner are cornering lights.
The smaller thin bars on the front are for fog lights
Sunday 19 November 2017
Saturday 7 October 2017
Cab Painting
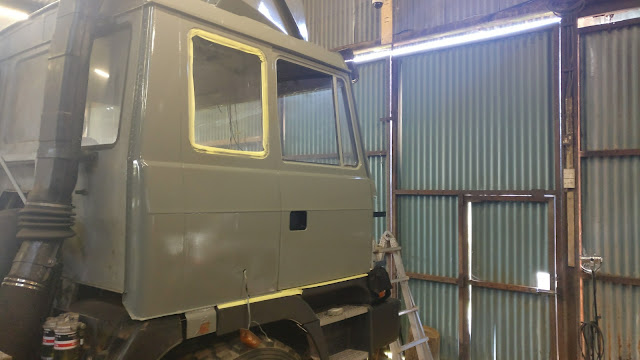
As discussed earlier in this blog I have decided to paint the truck myself using Rustoleum Combi color applied with a roller.
The finish isn't as good as a spray job, but let's be realistic, this is an off-road truck, not a show car.
The finish isn't as good as a spray job, but let's be realistic, this is an off-road truck, not a show car.
Roof Spoiler
I wanted to fit a roof spoiler or "Wind Kit" as some people call them, The idea is simple, the Tatra is as aerodynamic as a brick, so to help to improve this a Spoiler is fitted to the roof of the cab to deflect the air over the body and increase the aerodynamics of the vehicle.
It is said that this also improves your fuel consumption by a small but not insignificant amount.

It is said that this also improves your fuel consumption by a small but not insignificant amount.

Tuesday 12 September 2017
Cab Air Conditioning, Still
Ok, it's done, no more air conditioning after this finally fitted the unit to the roof, it sits on some 10mm thick neoprene seal and is bolted from underneath.
It is now firmly attached and waterproof, just a few wires and its finnished.
You can just see the roof air spoiler taking shape in these pictures as well.
It is now firmly attached and waterproof, just a few wires and its finnished.
You can just see the roof air spoiler taking shape in these pictures as well.
Thursday 31 August 2017
Cab Air Conditioning, Next Installment
Slow progress, the paint takes 16 hours to dry, I painted both sides of the adaptor plate and now its finally fitted to the cab roof, I used sealed rivets and gray Sickflex 221
Once I fitted it I painted over all the rivets to finish it nicely. The paint is wet in this picture.
I may have over done it with the rivets, but it's on there now and it ain't moving.
Once I fitted it I painted over all the rivets to finish it nicely. The paint is wet in this picture.
I may have over done it with the rivets, but it's on there now and it ain't moving.
Wednesday 23 August 2017
Painting the cab roof
I have recently been giving a lot of thought to the painting of the cab and later body. I would love to have a really good job done by a professional paint shop but several things make that awkward and cost prohibited.
I then thought I would spray the truck in the workshop, but then realized its really dirty and dusty in there and everything would get covered in over spray.
Then I came across a Volkswagon van forum, that was talking about painting with a roller, I thought that this can't possibly be any good, but then saw pictures and videos of the finished product. These guys were able to get a showroom finish with a roller!
So to sum up, I am not looking for a showroom finish, after all, it's an off road truck, I am looking not to get paint everywhere, and I don't want to spend a fortune on paint, also I would like to be able to do it myself in my own workshop.
It's important to remember, this is an old truck.
So I decided to first paint the roof of the cab, I needed to do it before I fit the air conn to it and I figured if I mess it up it won't be seen anyway.
Overall I was very pleased with the results, two coats of paint, total cost less than a tenner.
The paint I used was Rustoleum Combicolour, and the color RAL 7005
Tuesday 15 August 2017
Cab Air Conditioning
I wanted to have an separate air conditioner for just the cab alone, After a bit of research i decided on a Weaco RT 880 its a stand alone 24volt system that requires nothing but a 24v connection.
It has a remote control and four outlets in the cab. it fits directly to the roof of the cab usually in the roof hatch hole, Unfortunately my Tatra does not have a standard roof hatch, As the cab was originally a military cab It has a gunners hatch.
Now, as much as i like the idea of a gunners hatch in my off road camper i feel that in reality there's probably no need for it. So i set about modifying it to take the air conditioner instead.
the hole had a 20 mm flange that sticks up from the roof in order for the hatch to fit over it and seal, i had to cut this off and grind it back to the roof level, the remove the hinges that were welded to the roof for the hatch.
Once the aperture was ready i made an adapter plate from 3mm aluminum that would fit to the roof aperture and take the air conditioner unit.
This plate will be sealed to the roof with sickaflex and sealed rivets.
Wednesday 9 August 2017
Thursday 27 July 2017
Roof Rack Started
I started on the roof rack, its purpose is to hold a couple of kayaks and act as a mounting point for some LED lights.
There wont be much room up there once the cab air conditioning unit is fitted and the aerodynamic drag reduction system is fitted.
The will be a small amount of space for non mission critical stuff.
There wont be much room up there once the cab air conditioning unit is fitted and the aerodynamic drag reduction system is fitted.
The will be a small amount of space for non mission critical stuff.
Tuesday 18 July 2017
Windscreen protection.
I started on what i call windscreen protection, essentially its two steel bars that run vertically from the bumper up the front of the truck art the sides of the windscreen, they connect to the roof rack at the top.
The point of this is that any branches that would normally hit the screen will instead contact the steel bars and be deflected up and over the cab, effectively protecting the windscreen from the branches.
i started by removing the corners of the cab and attaching some 40mm x 6mm steel directly to the chassis of the cab, this only has to support the 40mm box section upright, i used 2mm wall thickness here to keep the weight down on the cab. Bearing in mind i will be adding two massive seats and two more seats as well.
the brackets on the cab will be bolted to the uprights with m12 stainless bolts and locknuts. there will be a n additional bar going horizontally between the two uprights at the bottom of the windscreen, this will serve to mount some LED Light bars onto.
Thursday 13 July 2017
Cab Heater Finished
Today i finished the Webasto Cab Heating system. I fitted a 2000ST 2Kw diesel powered heater, as there is no water cooling on the engine an alternative source of heat is required.
I coupled the 2000ST to a MultiControl HD, its the latest controller from Webasto and enables the heater unit to be used as a ventilator as well as all the usual timing functions. It also looks pretty cool.
the exhaust runs through a silencer and out under the passenger side of the truck.
I coupled the 2000ST to a MultiControl HD, its the latest controller from Webasto and enables the heater unit to be used as a ventilator as well as all the usual timing functions. It also looks pretty cool.
the exhaust runs through a silencer and out under the passenger side of the truck.
Monday 10 July 2017
Steering Box Universal Joint
Whilst working on the dash, I noticed that there was a slight bit of play in the steering column. On further investigation, i found it was the universal joint between the column and the steering box. unfortunately, someone in the past had welded one of the journals in, it was a bit awkward to get it out without damaging the steering box, but once out It was a simple and cheap job to replace the UJ with a new one.
Sunday 9 July 2017
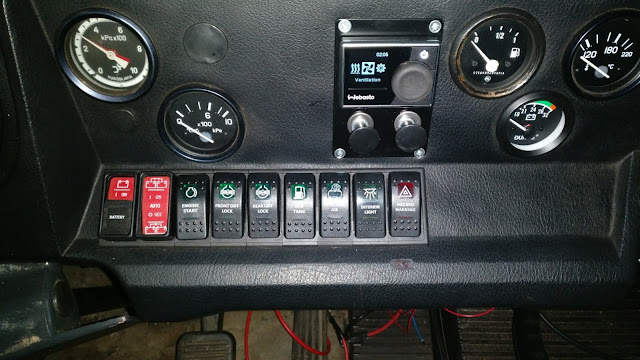
Dashboard switches finnished
Today with the help of my buddy Andy Linton (thanks andy) we managed to work out the complex hazard warning switch with its multiple wires.
Once again an old type Bakelite switch similar to the ones Noah used on the Ark.
It was the last one to sort out, so now all the dash switches are working and looking good.
Heater controls next, then that's the dash finished.
Here is the offending switch:
And here is its replacement, (far right)
Update, heater controls fitted.
Thursday 6 July 2017
Rebuilding the Dashboard
There wasn't really anything wrong with the dash switches and for the most part they were all working,
However the switches we labeled with generic symbols and it was not really apparent what they really did, That and the fact that they were scattered around the dash with no semblance of order at all.
The same goes for the warning lights, i think they were shaken up in a box and thrown at the dash that had random holes in even more random places.
As well as all that the switches looked very "dated", now it's not a new truck by any means but they really looked old.
I am afraid my OCD got the better of me and they all had to go. First i moved all the warning lights to the top of the dash all in one line.
Then removed all the switches, cut out holes for the new ones and refitted it all, i had to fit blanking grommets in some holes, but managed to loose most of them behind the new holes.
There is a digital control for the cab heater to be fitted yet.
Yes it was a lot of work but it looks a lot better now, and its more functional.
After and Before Pictures
Subscribe to:
Posts (Atom)


